Showing posts with label mooncakes. Show all posts

Thursday, 24 September 2015

Gudetama, Pooh & Tigger Mooncakes

Thankful for a much needed public holiday today where I can wake up later. I was feeling really tired these few days, having insomnia and can't really sleep at the time I'm supposed to, ended up having to drag myself out of bed every morning. :( The haze is terrible today, we were planning to bring the boys outdoor, but it was so bad, we ended up at home most of the day and just head out for meals at the malls instead.

IMG_6877
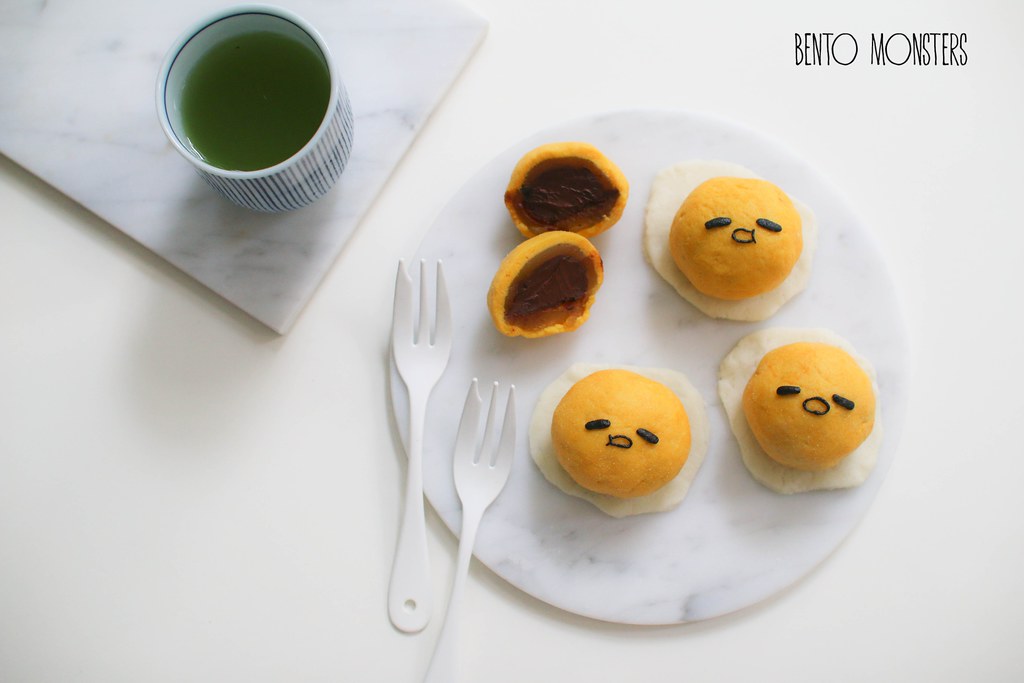
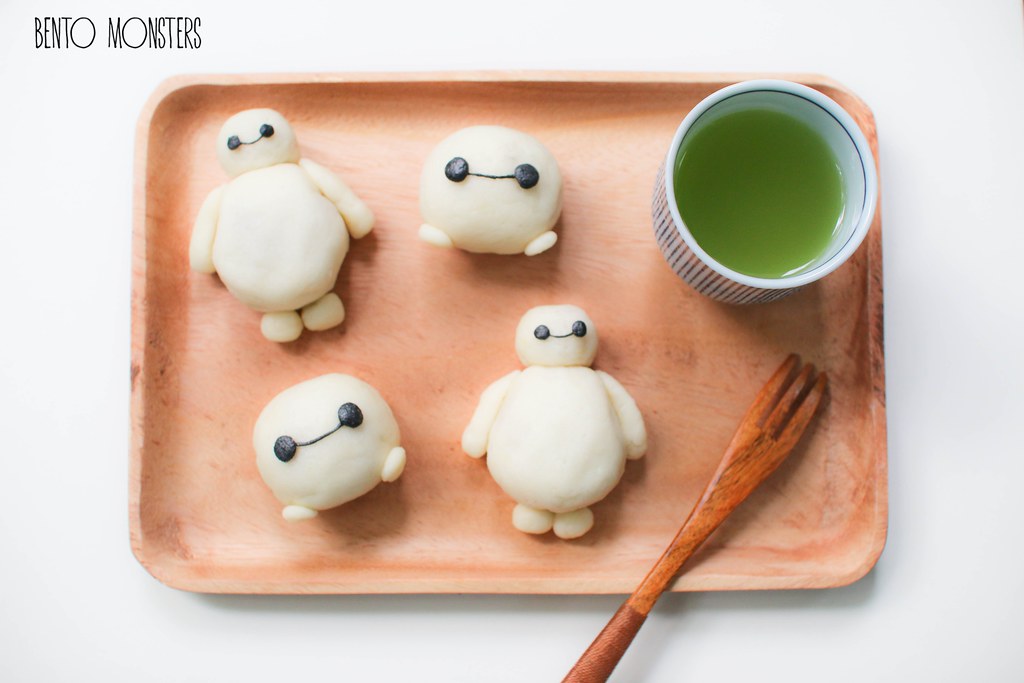
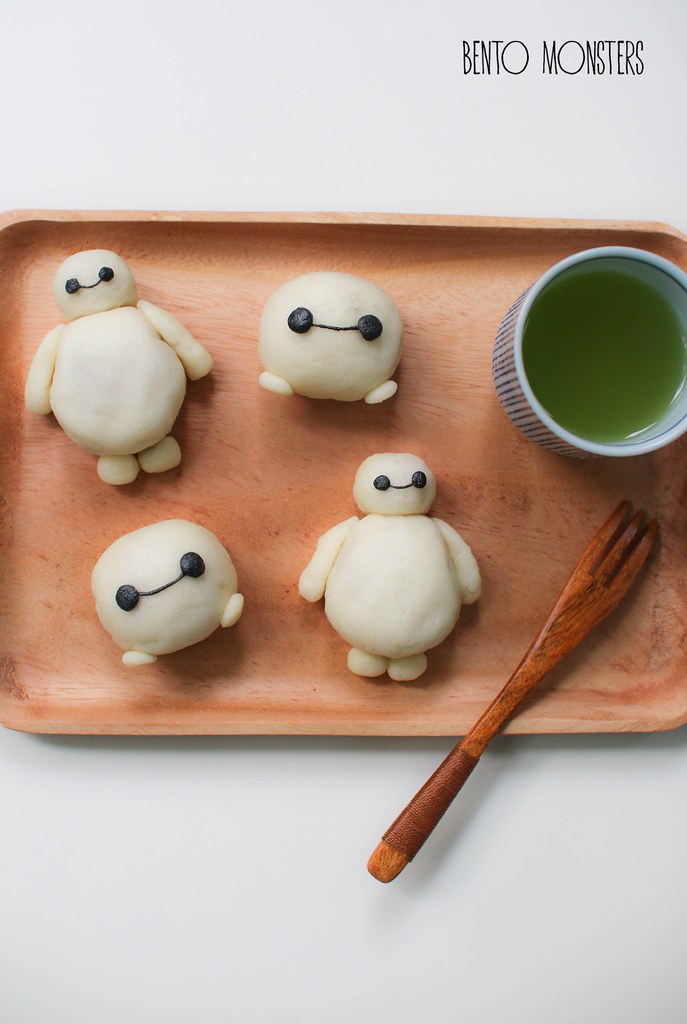
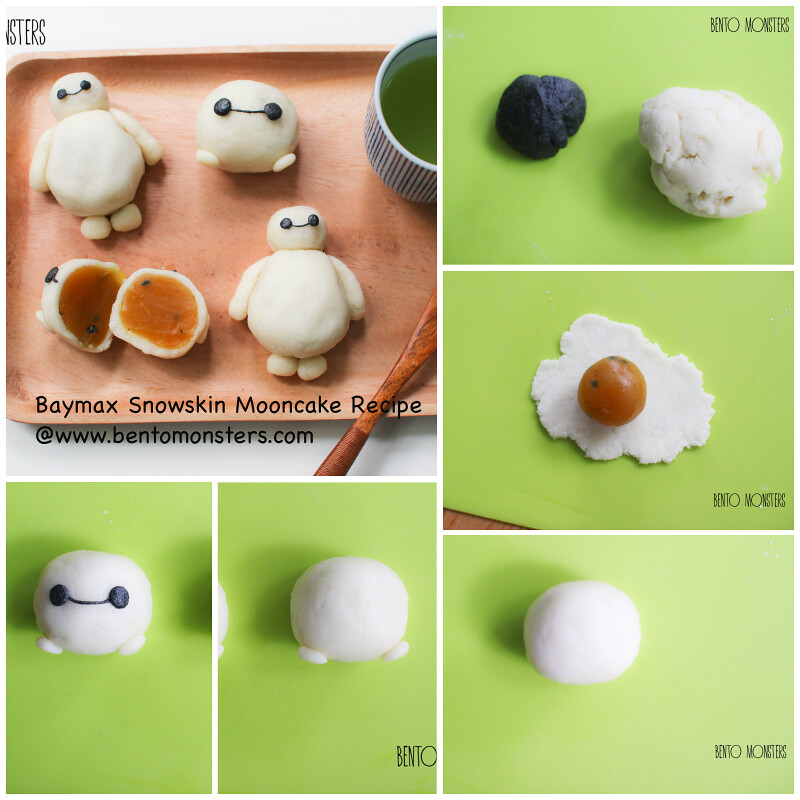
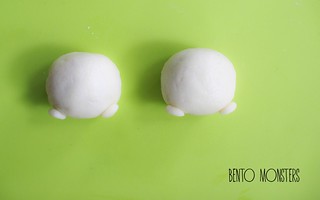
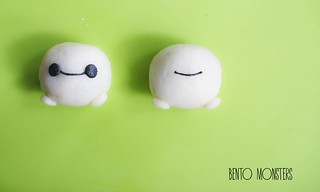
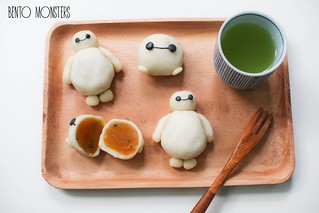
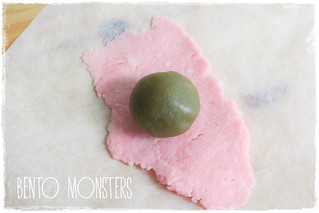
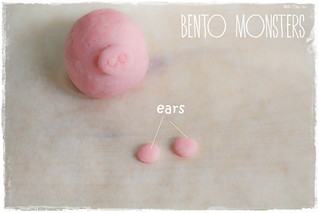
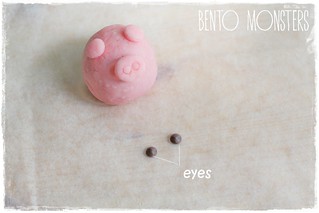
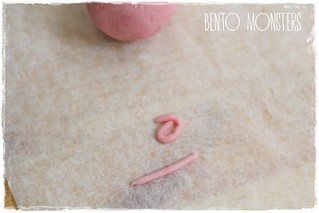
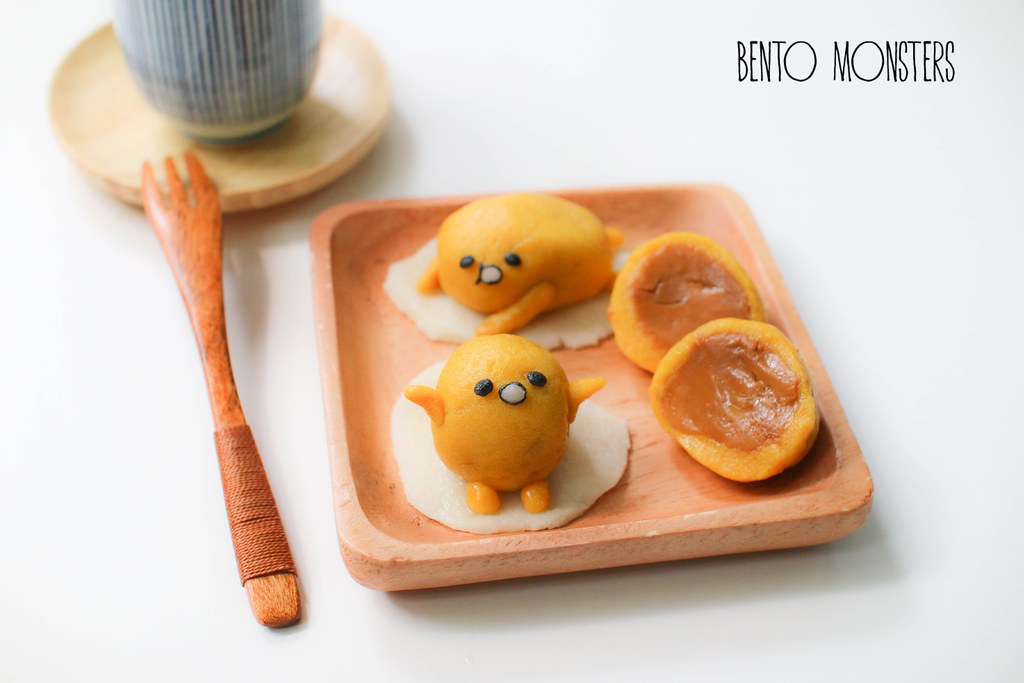
Ah, I just realised Mid-Autumn festival is on this sunday. I kept having the impression that it's still quite far away. -_- So, I guess I'll just share all the rest of my snowskin creations in this post, instead of splitting them up. Sorry for putting them up so late. First one I'm sharing is Gudetama snowskin mooncake, this is also another easy character like the Baymax one I shared earlier.

IMG_6875
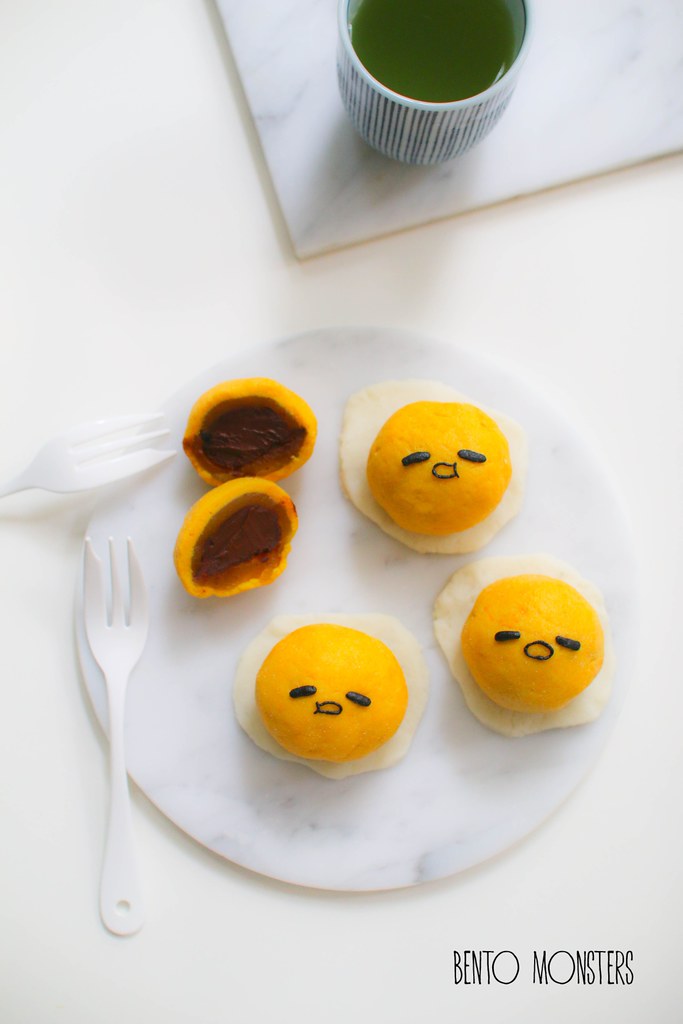
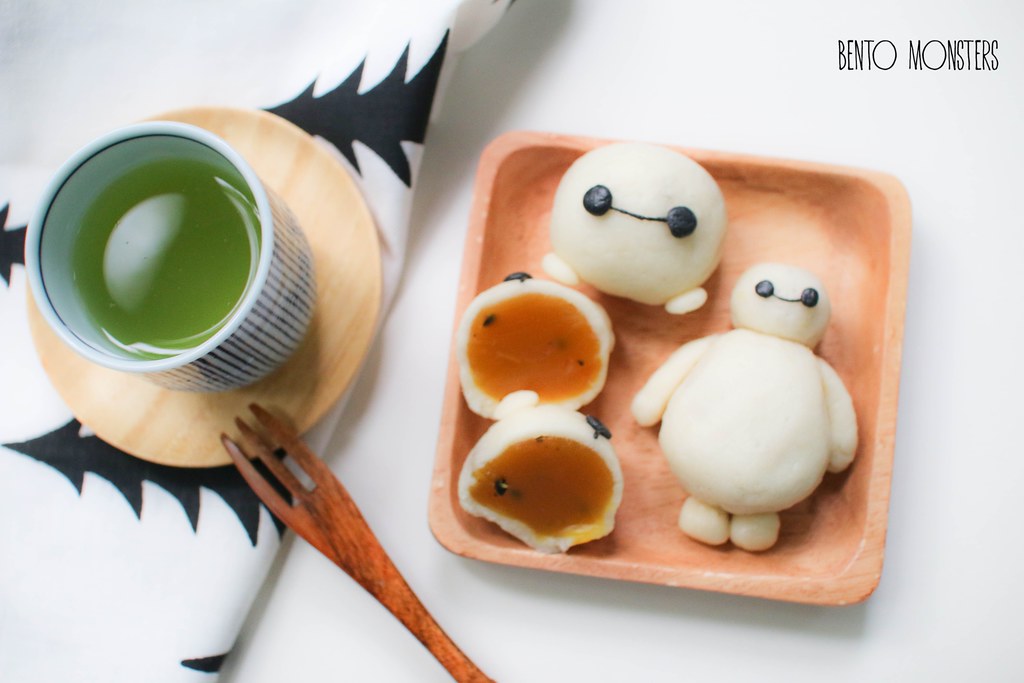
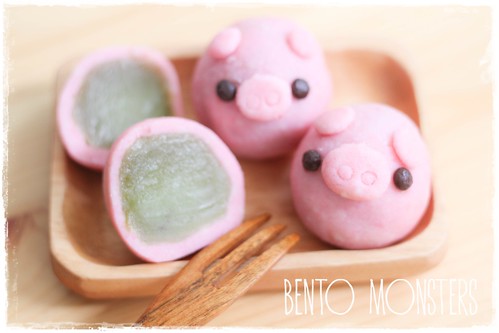
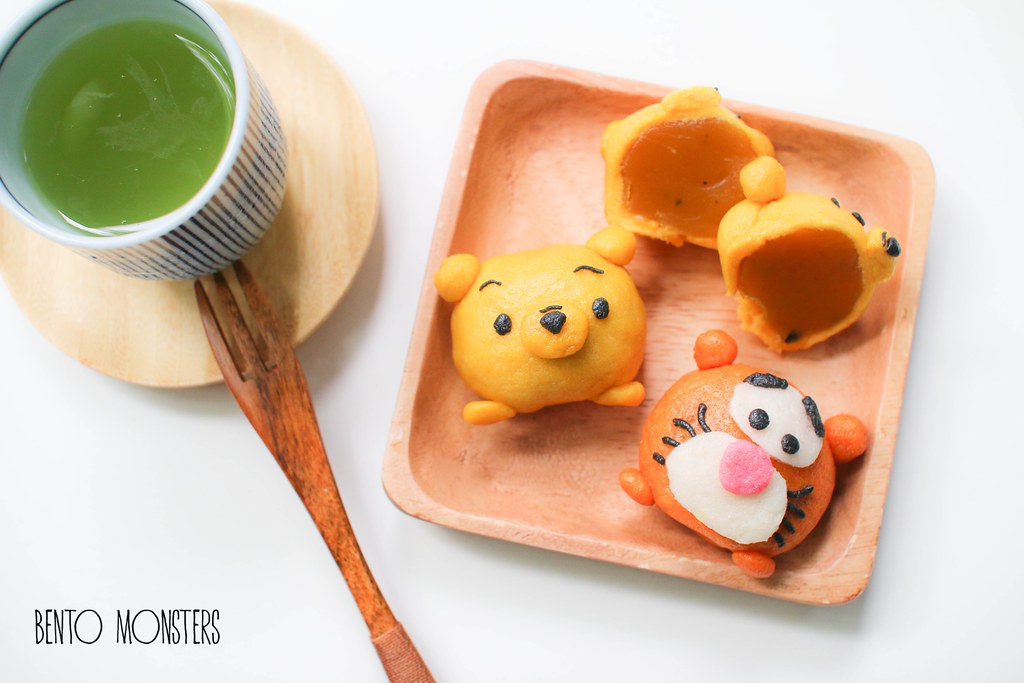
I used passion fruit paste for the fillings and wrapped it around champagne truffle.

IMG_6878
I should have done this earlier, love the addition of truffles.

IMG_5988
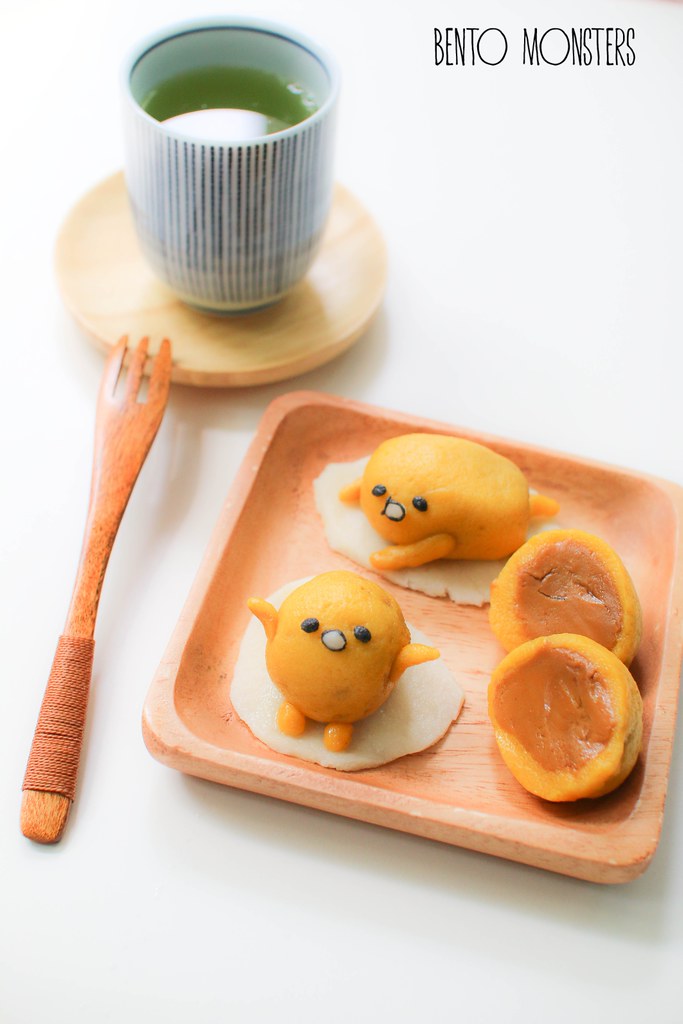
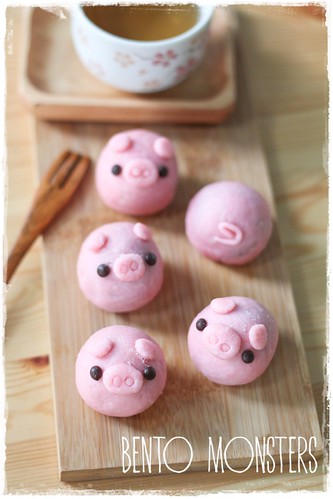
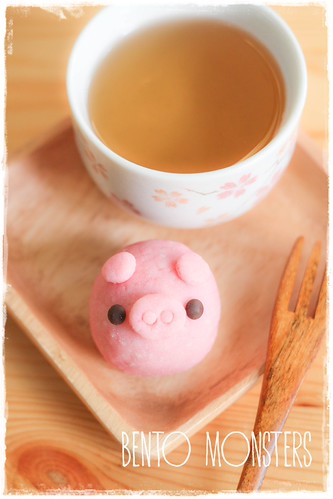
This was another version of Gudetama I made earlier, this one was filled with royal milk tea paste.

IMG_5991
Gudetama is now one of my favourite character to make.

IMG_5931
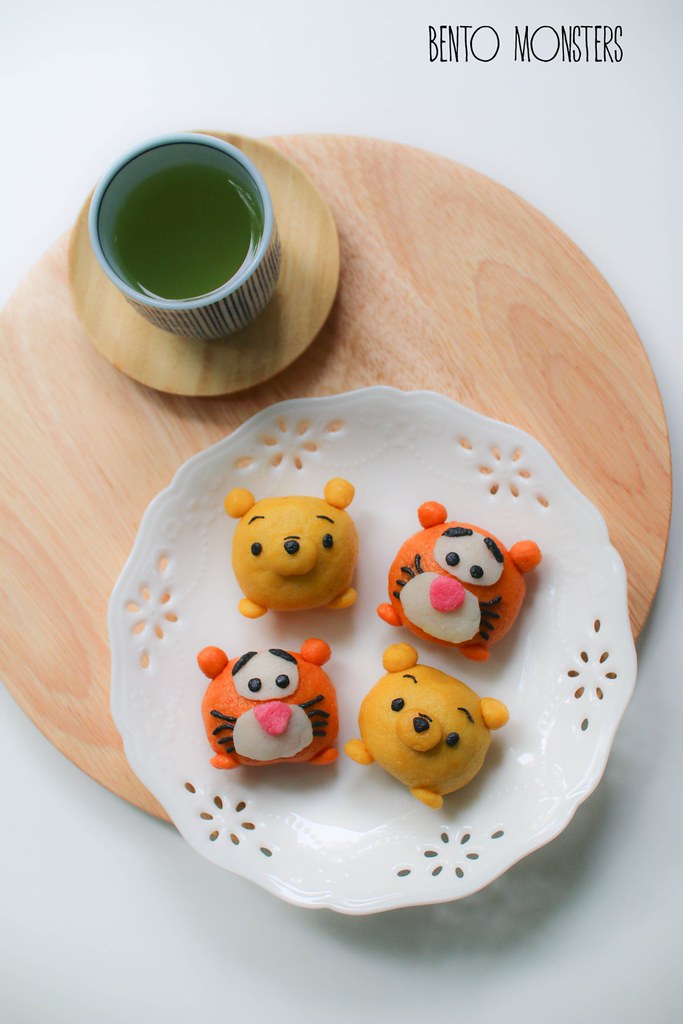
Yet another snowskin mooncake design I made, Tsum Tsum Pooh and Tigger.  Pooh one is easy but Tigger is a little more work.

IMG_5955
It was quite fun making these mooncakes, that will be all for this year, will be back again next year with new designs, lol. :)

Friday, 28 August 2015

Baymax Snowskin Mooncake

It's the time of the year for making mooncakes again, actually still a little early to Mid-Autumn Festival, but I see them popping out in stores already and was tempted to start. I first tried hand moulding snowskin mooncakes into characters last year and I've been waiting for this year to try out more designs. :) You can take a look at the designs I did last year here.

IMG_5943
I made a few characters on Tuesday, and the first character I'm sharing for today's post is Baymax. Love how easy it is to make him, lol. For the benefit of my readers who aren't familiar with mooncake, mooncake is a traditional Chinese pastry, eaten during the mid-autumn festival. The one I'm sharing today is a spin-off from the traditional baked mooncake and it's called snowskin mooncake. There is no baking involved, it's heathier and it's really easy to make. Snowskin mooncake is a little like the Japanese mochi.

IMG_5946
I made two designs for Baymax, I only showed the steps to make the simpler one. For the full body version, I added fillings for both the head and the body, the hands and legs are just moulded using the snowskin. I'm using back the same snowskin mooncake recipe I shared last year, it's the simplest I've found. Not the tastiest recipe I've tried but still acceptable. Feel free to substitute with your own recipe.

IMG_5962
The mooncakes were filled with passion fruit paste. I did not make the paste from stratch, the paste was store-bought. I remembered a few people asking me where I bought the paste last year. My reply then was I would not recommend the shop I bought from but I would recommend them to get the paste from Kwong Cheong Thye instead. This year the paste I'm using is from Kwong Cheong Thye, they have quite a few interesting flavours, in addition to the traditional ones.

baymaxmooncake
Hand moulding the mooncakes does take a little longer than using a mould, but these Baymax ones are still relatively fast to make, as compared to the other characters I've yet to share.

BAYMAX SNOWSKIN MOONCAKE

Ingredients:
150g Gao Fen (cooked glutinous rice flour)
150g Icing Sugar
50g Shortening
180g cold water
1/2 tsp charcoal powder
Mooncake filling - I used green tea white lotus paste

Method:
  1. Sift Gao Fen and icing sugar together in a bowl.
  2. Add in shortening to the mixture and combine. 
  3. Slowly add in the cold water, you might not need to use all. You can stop once you are able to knead into a dough. Take out 1 small portion of dough and add on 1/2 tsp of charcoal powder, add on more charcoal powder if needed.  Knead till colour is evenly mixed. Cover with cling wrap and let the dough rest for 10 minutes.
  4. IMG_5912
  5. Weigh white dough and fillings, I used 30g of fillings to 25g of dough. Flatten dough with rolling pin, roll fillings into a ball and place on top. 
  6. IMG_5913
  7. Seal and wrap mooncake using your hands. Mould into oval shape.
  8. IMG_5916  
  9. Take some dough, mould two hands for Baymax. This step is optional, if you want it to be even simpler, you can leave out the hands. 
  10. IMG_5919
  11. Using black dough, mould two circles for Baymax's eyes. For his mouth, you have to roll out some dough using your hands till you get a long thin strip, then cut to the required length.
  12. IMG_5920 IMG_5949

Friday, 22 August 2014

Hello Kitty Snowskin Mooncake

It's another mooncake post today, want to clear off this post before Mid-Autumn. Thought of updating this next week, but I was afraid if I were to procrastinate any longer, I'll probably end up updating this after Mid-Autumn is over.

IMG_2346
I made these Hello Kitty mooncakes on the same day as the piggies mooncakes I just shared on Wednesday. The sun was almost setting when I was done with the piggies, so it was a super rush job making these, as I wanted to get a shot of them before the sky turns dark.

IMG_2327
The recipe to make this is exactly the same as the piggies mooncakes.

IMG_2349
These were hand moulded like the piggies mooncakes. You can actually use a Hello Kitty cookie cutter/stamper set or rice mould to make your mooncakes too. However, if you do not own one, you can try moulding them using my recipe below.

HELLO KITTY SNOWSKIN MOONCAKE

Ingredients:
150g Gao Fen (cooked glutinous rice flour)
150g Icing Sugar
50g Shortening
180g cold water
A little Wilton pink gel food colouring
A little Wilton brown gel food colouring
A little Wilton yellow gel food colouring
Mooncake filling - I used green tea white lotus paste

Method:
  1. Sift Gao Fen and icing sugar together in a bowl.
  2. Add in shortening to the mixture and combine. 
  3. Slowly add in the cold water, you might not need to use all. You can stop once you are able to knead into a dough. Take out 3 small portions of dough, using a toothpick, colour the dough pink, brown and yellow using Wilton gel food colouring. Knead till colour is evenly mixed.
  4. IMG_2309
  5. Weigh white dough and fillings, I used 30g of fillings to 25g of dough. Flatten dough with rolling pin, roll fillings into a ball and place on top. 
  6. IMG_2311
  7. Seal and wrap mooncake using your hands. Mould into oval shape.
  8. Take a little  white dough, mould into triangular shape for Kitty's ears.
  9. IMG_2315
  10. Take a little pink dough, mould into 2 triangular shape and 1 round shape for Kitty's bow. Using a knife/toothpick, make indentations on the 2 triangular portions.
  11. IMG_2318
  12. Assemble the ears and bow. Using the yellow dough, mould an oval for Kitty's nose.
  13. IMG_2320
  14. Take a little brown dough, mould into oval shape for Kitty's eyes.
  15. IMG_2321
  16. Take a little brown dough, roll it out and cut into sections for Kitty's whiskers.
  17. IMG_2323IMG_2331

Wednesday, 20 August 2014

Piggy Snowskin Mooncake

It's been a few years since I last made mooncakes. Nobody really likes them much at home. I don't really fancy the baked ones but I love snowskin mooncakes. I always buy a box every year, since nobody at home eats much, I always end up eating everything, lol.

IMG_2358
I did not use back my usual recipe this round, came across a super easy recipe sometime back in a magazine, took it down with the intention of giving it a try this year. Not the best recipe I've tried but it's the easiest one. I'm sharing the recipe at the end of this post. Feel free to use back your own recipe if you like. :)

IMG_2354
I made some Hello Kitty mooncakes with this batch, I'll leave those for another post. I still have mooncakes ingredients left, might make more designs if I can find the time.

IMG_2432
I filled the piggies mooncakes with store bought green tea white lotus paste. I've not made the paste from scratch before, so I've no recipe to share for that.

IMG_2334
Took quite a number of photos, so allow me to spam another picture of this piggy mooncake. :P

PIGGY SNOWSKIN MOONCAKE

Ingredients:
150g Gao Fen (cooked glutinous rice flour)
150g Icing Sugar
50g Shortening
180g cold water
A little Wilton pink gel food colouring
Mooncake filling - I used green tea white lotus paste

Method:
  1. Sift Gao Fen and icing sugar together in a bowl.
  2. Add in shortening to the mixture and combine. 
  3. Dissolve some pink colouring in cold water. Slowly add in the cold water, you might not need to use all. You can stop once you are able to knead into a dough.
  4. IMG_2306
  5. Weigh dough and fillings, I used 30g of fillings to 25g of dough. Flatten dough with rolling pin, roll fillings into a ball and place on top. 
  6. IMG_2301
  7. Seal and wrap mooncake using your hands. Flatten the base and mould it slightly oval in shape.
  8. Take a little dough, mould into oval shape for piggy's nose, use a straw to poke 2 holes.
  9. IMG_2305
  10. Take a little dough, mould into 2 ovals for piggy's ears.
  11. IMG_2307
  12. Use 2 small chocolate chips for piggy's eyes.
  13. IMG_2308
  14. Take a little dough, roll it out before curling it up, this will be the piggy's tail.
  15. IMG_2419IMG_2362